Deaths Sickle Tutorial
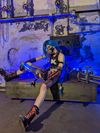
"Everyone thinks they'll be the one to defeat me, but no one has escaped me yet"
Difficulty: Easy
Time: Short
Table of contents
- Prerequisites
- How it works
- Printing
3. Handle
4. Blade - Assembly
6. Magnets
7. Find the right orientation
8. Insert the magnets
9. Screwing it together - Painting and details
- 3d print files
Prerequisites
- 3d printer
- 3mm screw (30-35mm length)
- Small magnets
- Superglue or other strong adhesive
- Drill with drill bits (reccomended)
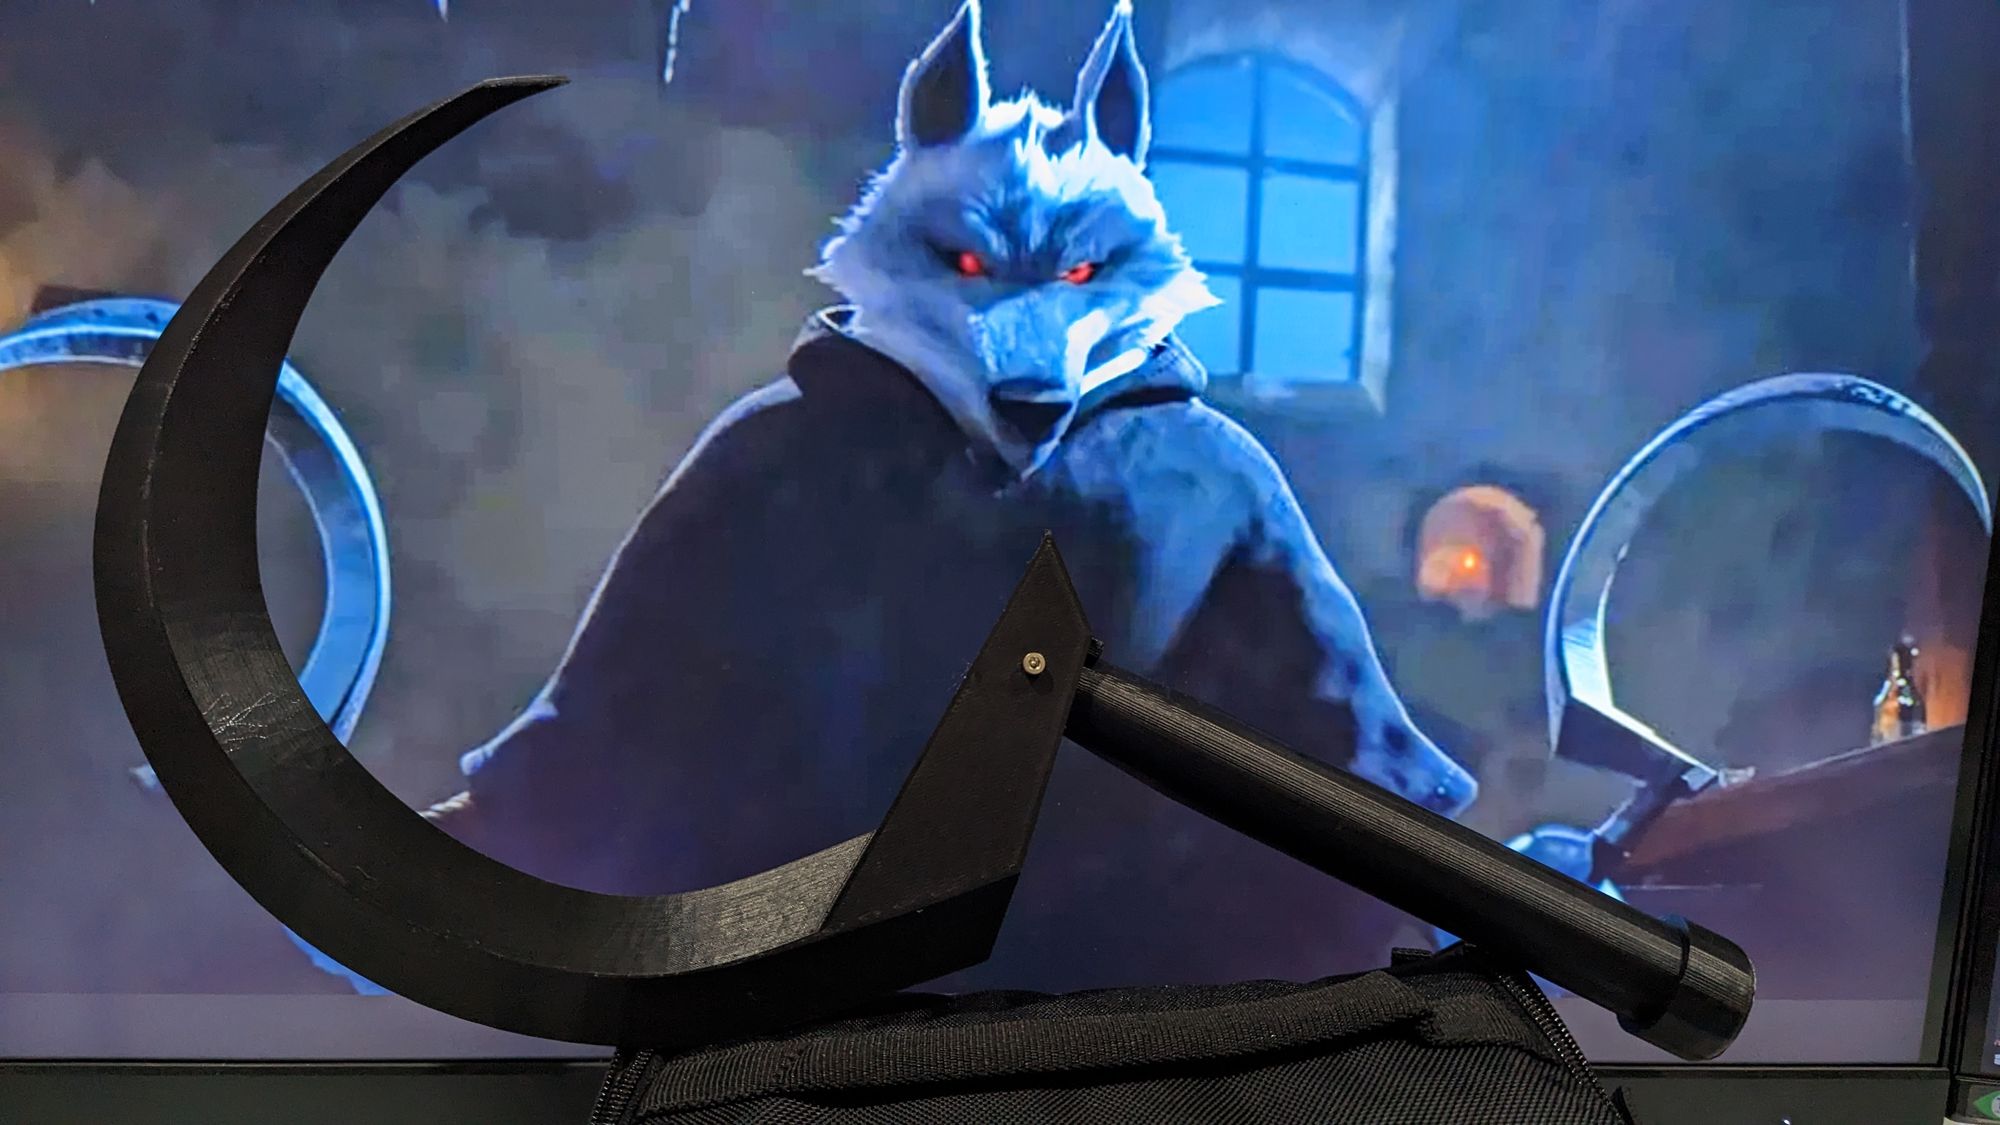
In this tutorial you will get the files needed to print Death's sickle from Puss in boots: The last wish. As well as the steps to assemble it.
This is a short and easy print/assembly consisting of 2 main pieces. You will also need 1 3mm screw and some small magnets. A 3mm nut is a nice to have as well.
How it works
In order to transition between the 2 forms, this sickle consists of 2 pieces, the handle and the blade. They are joined using 1 screw that acts as the axel for them to rotate around. They are held in place by magnets at the 2 positions.
Printing
Handle
I reccoment printing this piece with a brim for max bed adhesion and print it straight up and down.
NOTE: There are 2 handle files, I reccomend only using HANDLE NO DRILL.stl only if you do not have a drill and a set of drill bits.
Blade
I suggest printing this piece as lightly as possible. Since the magnets are not super strong every gram you can shave off of this part will make it stay in the forms better.
I reccomend a low infill (5-15% max) and only 2 wall layers.
The best orientation depends on your print bed size, fit it however you can. If you need to , you could slice it into smaller pieces and glue them together.
Assembly
Assembly is luckily very straight forward, since we only have 2 pieces.
Magnets
The magnets fit in 4 groups of 2. 2 groups on the handle and 2 on the blade. These groups come into contact and hold the blade and handle in a given form.
Find the right magnet orientation
As you might know, magnets have 2 sides and can repel or attract other magnets depending on what sides are close to each other. Because of this we want to make sure that our magnets are lined up properly so they stick together and hold the blade and handle together.
The best way to line them up is get 2 groups of 4 magnets and arrange them like so:
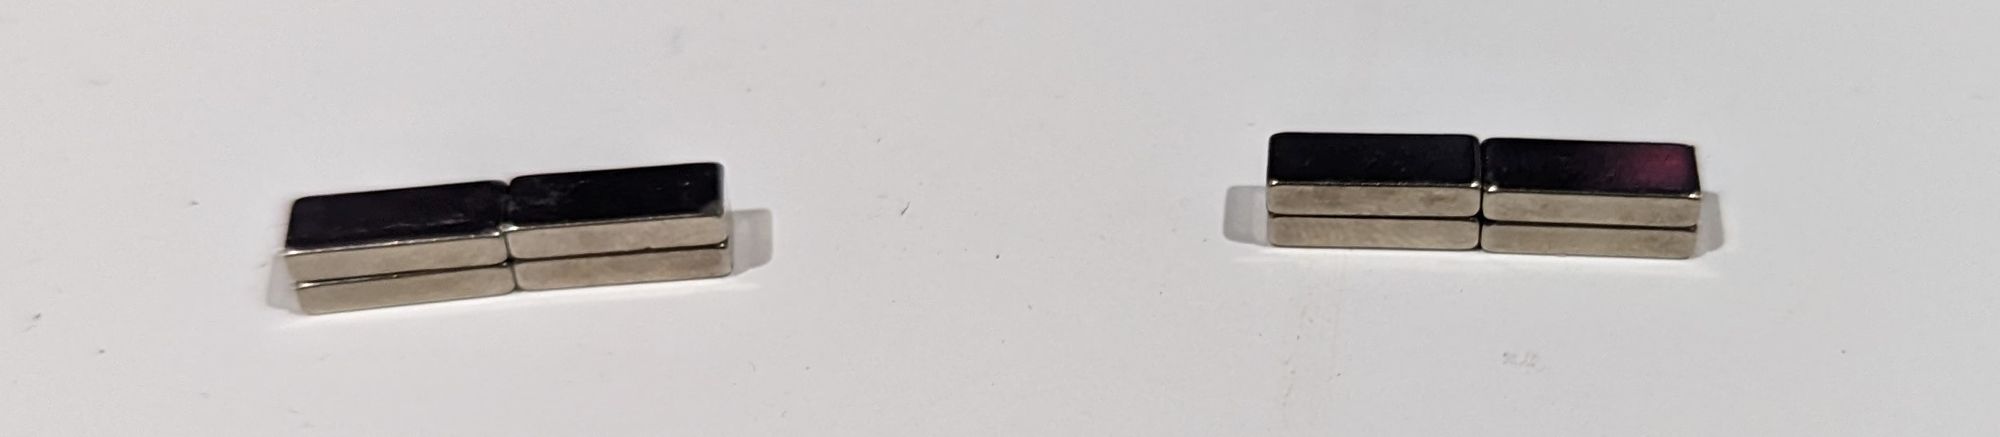
Take a marker and mark both sides of both groups so you can remember the spot for each magnet in the group. When we put them into the blade and handle we need to keep these orientations so they stick together when we want.
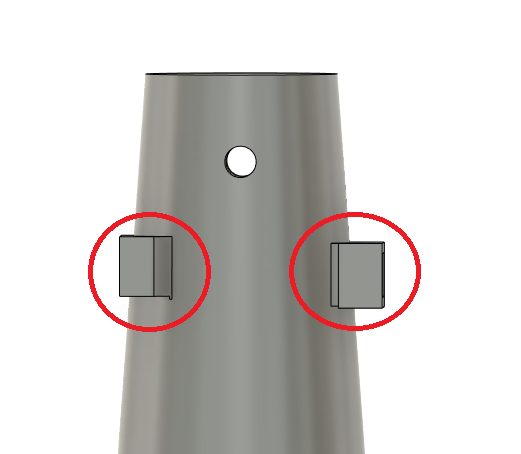
The 2 connection points on the blade are:
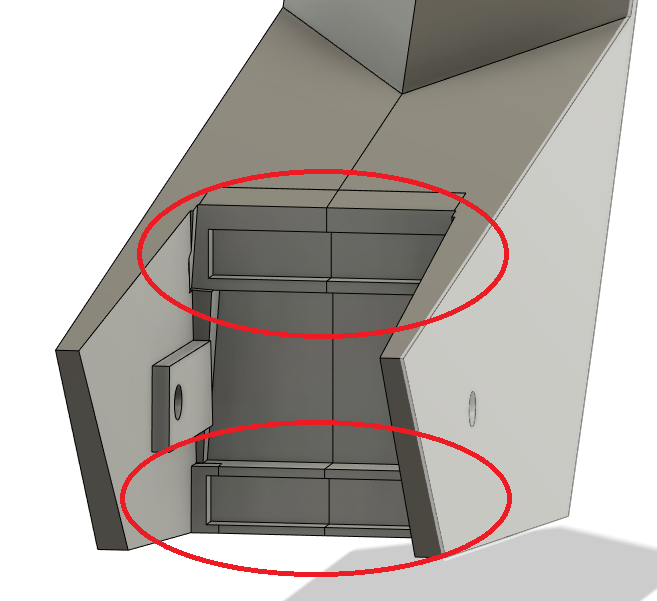
The top is used when the handle is folded, and the bottom used when the handle is in the default position.
The 2 magnet points on the handle are:
The one slightly lower is used when the blade is folded, and the one slightly higher is used when the blade is in the default position.
That in mind you need to make sure the magnets in these 2 groups line up so they stick together:
- Bottom spot on the blade : Higher spot on the handle
- Top spot on the blade : Lower spot on the handle
Inserting the magnets
Once the magnets are lined up correctly you can glue them down in their spots. Each spot holds 2 magnets end to end.
I reccomend to make sure they are glued well, as with too little glue they can pop out over use.
Screwing it together
If you have a drill with bits
For the best precision the hole in the handle for the screw is too small to spin freely. Take increasingly larger deill bits and drill out that hole until the screw can slide through freely.
Why use a drill over the NO DRILL file
This allows for the best fit and the most secure handle. Since everyone has a different printer this is the best way to get everyone the most snug fit.
You can now line up the holes on the handle and the blade and screw them together. The screw should be tight where it meets the blade and slightly loose in the handle without allowing any play.
If the handle hole is the correct size the handle and blade should not move independant of each other and change forms.
If you have a long screw a nut on the exposed end will help secure it more.
Painting and Details
I have not painted or detailed it yet as I am focusing on other things. Here are some reccomendations though:
- Prime with a good filler/sandable primer
- Using a metalic paint like Alclad could look really cool if you can airbrush
- If you want to use spraypaint, something like Hammered paint could turn out cool too.
- For the handle I suggest using some bicycle handlebar tape.
- Etching in the cats is probably best done after paint, before aging wash/clear coat. On my Pow Pow I etched with an exacto knife. Be careful
- For aging a good pewter wash would work great.
3D print files
These files are provided under the Attribution-NonCommercial-ShareAlike 4.0 International License.
TL:DR - You can download, use and modify these files, however, you can NOT use them for making money, you can NOT sell them. If you modify them and provide the files after modifying, you must provide the files for free, with this same license.
You can download the files from Cults3d or my Etsy Store
I also sell pre-printed unpainted versions of this on my etsy if you cannot print it yourself.

